
Properly preparing a subfloor for tile can only add to the long-term integrity of the tile installation. Successfully installing ceramic floor tiling requires a clean, level, one-inch-thick subfloor. In addition, the design of the subfloor must provide stability and strength to withstand the tile weight without flexing or moving. A dirty, uneven, unstable, or weak subfloor significantly increases the risk of cracked tiles.
After adequately preparing the subfloor for ceramic tile, Polyguard suggests you apply an anti-fracture underlayment membrane, like Polyguard Tileguard™. Tileguard™ creates a layer between the subfloor and the tile that absorbs the stress created by a damaged subfloor, that prevents it from transferring up and cracking the floor tile.
Steps to Preparing a Subfloor for Ceramic Tile
The success of a tile project tremulously depends on properly cleaning, leveling, and repairing the subfloor.
STEP 1: Clean the Subfloor
Remove dirt, debris, etc., then clean the subfloor with plain water. Next, mix a degreasing cleaner with warm water and thoroughly scrub the floor with a brush. Finally, completely rinse the subfloor and let it dry overnight.
Note: An immaculately clean surface will ensure that your tiles bond sufficiently with the subfloor. Dirt or debris can cause unevenness, and lead to tile breakage.
STEP 2. Level the Subfloor
A successful tile application requires a level wood or concrete subfloor:
- Preparing plywood subfloor for tile: Builders can sand wood subfloors to level them. However, wood subfloors that move or flex under pressure may require the addition of supporting bridging between the joists or nails into the joists.
- Preparing concrete subfloor for tile: Builders can use a leveling compound, like Polyguard LM-85 SSL, to even out and level concrete subfloors.
Note: Unlevel spots in the subfloor will cause the tile to crack
STEP 3. Fill Cracks and Gaps in the Subfloor
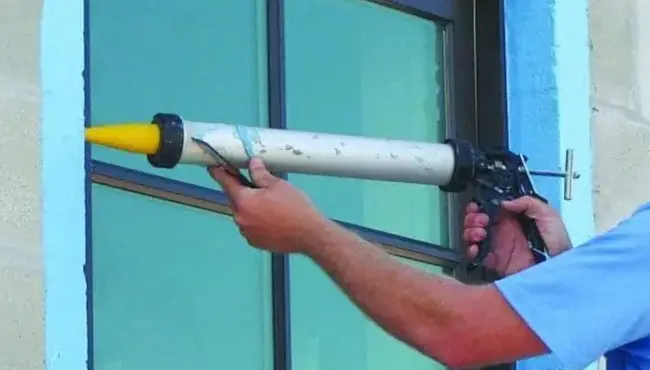
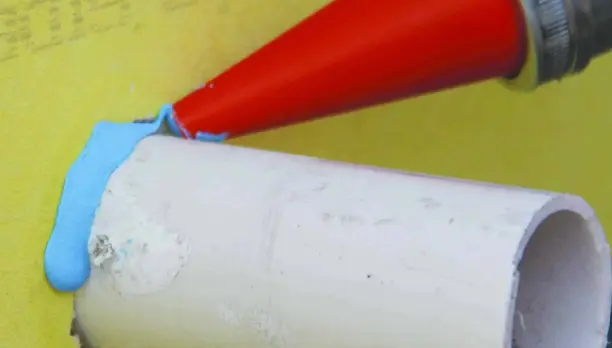
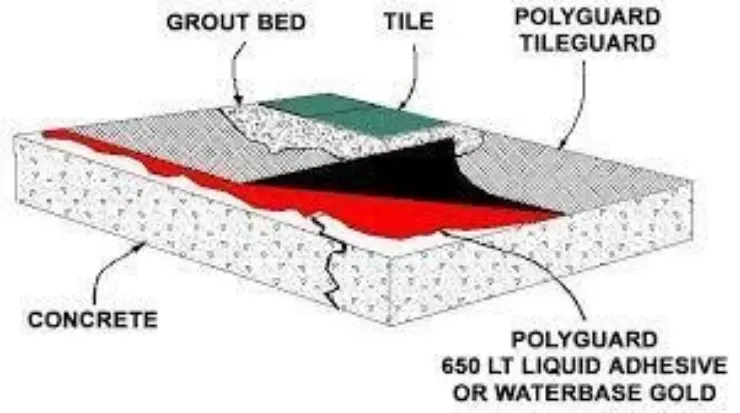
Using a roller or brush, fill non-moving cracks and gaps (greater than 3/16 inch) with an adhesive like Polyguard 650 LT or 650 WB Liquid Adhesive:
- 650 LT Liquid Adhesive (a rubber-based adhesive in solvent solution) primes all structural wood, concrete, or masonry surfaces for applications down to 25°F (-4°C).
- 650 WB Liquid Adhesive (a rubber-based, water-based, low-tack adhesive) primes all structural wood, concrete, or masonry surfaces for applications in ambient and surface temperatures of 40°F (5°C) and higher.
Notes:
- Stir the adhesive before using.
- Do not apply the adhesive in multi-coat or excess amounts.
- The smallest cracks or uneven spots in the subfloor will cause the tile to crack.
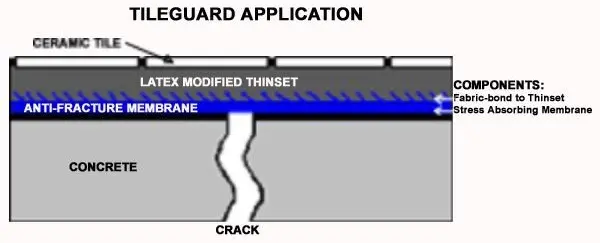
STEP 4: Apply Anti-Fracture Underlayment Membrane
Once sufficiently prepared for the subfloor, you can install an anti-fracture underlayment membrane, like Polyguard Tileguard™. When installed according to manufacturers’ instructions, the membrane creates a stress-absorbing layer between the subfloor and the tile, to absorb the stress created by a damaged subfloor, and prevent it from transferring up and cracking the tile.
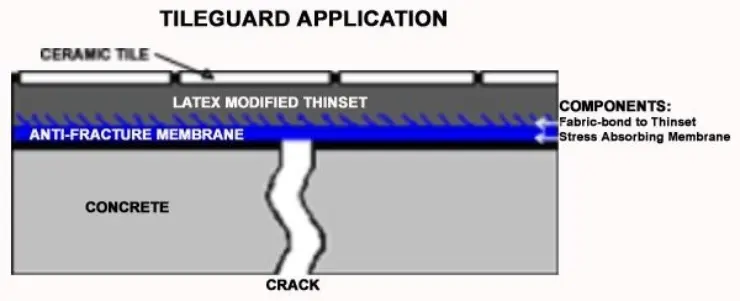
Tileguard™ Anti-Fracture Underlayment
Tileguard™ “Anti-Fracture Underlayment Membrane creates a stress-absorbing layer between the subfloor (wood or concrete) and the tile. The Tileguard™ rubberized asphalt absorbs the stress created by a damaged subfloor, so it doesn’t transfer up and crack the tile. Tileguard™ also helps create warmer, quieter, and drier indoor environments.
Builders can easily apply elastomeric, self-adhesive Tileguard™ membrane over various subflooring surfaces and under ceramic or brick flooring with thick or thin tile setting materials. In addition, the silicone-treated release liner prevents sticking when rolled, which contributes to its’ ease of application.
Polyguard manufactures peel-and-stick Tileguard™ as a composite 40 mils thick membrane of rubberized asphalt, topped with fabric, to which the thin-set mortar bed adheres. The elastomeric, strong, self-adhesive membrane winds on cores with a disposable silicone release sheet.
Installing Tileguard™
Straightforward to install, Tileguard™ will protect your ceramic tile if properly installed according to the manufacturer’s instructions.
CLEAN SUBFLOOR: Clean the subfloor of dust, debris, etc.
Let the subfloor completely dry before proceeding.
LEVEL SUBFLOOR: For unlevel, new, and repaired concrete on horizontal concrete surfaces, apply a semi-self-leveling liquid waterproofing membrane, Polyguard LM-85 SSL, M-85 SSL:
ADHESIVE APPLICATION:
Notes:
- Stir the adhesive before using.
- Do not apply the adhesive in multi-coat or excess amounts.
Fill non-moving cracks (greater than 3/16 inch) with stirred 650 WB or LT Liquid. Adhesive. Apply the adhesive at 350-400 ft2 per gallon with a short nap roller or brush.
MEMBRANE APPLICATION:
Notes:
- Only apply the membrane to a dry, level subfloor surface.
- Polyguard recommends using latex modified/polymer-modified thin sets when using thin-set mortar.
- Cut the membrane to the required length.
- Remove the silicone-coated release sheet.
- Promptly place the exposed adhesive bottom onto the subfloor, smoothing it into place as you go, to avoid air blisters. If blisters happen, carefully slit them, and press the membrane flat.
- Use a roller to conform the membrane to the subfloor surface securely.
COOL WEATHER APPLICATION: Tileguard™ may lose some of its adhesiveness if applied in cool temperatures. The following measures can improve the membrane’s adhesion in cold conditions:
- Store the membrane rolls in warm storage.
- Apply 650 LT Liquid Adhesive to the subfloor before the Tileguard™.
Preparing Your Subfloor for Ceramic Tile with Polyguard Tileguard™
The long-term success of your ceramic tile installation depends significantly on designing and adequately preparing the subfloors. Sufficiently cleaning, leveling, and repairing a stable, strong subfloor will protect your ceramic tile floor from cracking. In addition, apply a quality anti-fracture underlayment membrane, like Polyguard Tileguard™.
Tileguard™ produces a vital layer between the subfloor and the tile that absorbs the stress created by a damaged subfloor, to prevent the stress from transferring up and cracking the floor tile.
Don’t hesitate to contact the Polyguard architectural professionals today for more on how to prepare subfloors for ceramic tiles.