Waterproofing membrane installation is fundamental to ensuring long-term structural integrity, particularly for basements, foundations, and roofs. This guide outlines the exact steps required to properly install waterproof membranes in various areas of a building, to help protect against moisture infiltration and its potentially damaging effects.
Polyguard's range of products is ideal for such installations, with comprehensive solutions designed to prevent water damage, mold growth, and costly repairs.
Why Waterproof Membranes Are Necessary
A well-installed waterproofing membrane acts as a barrier between moisture and the building’s structural components. These membranes are necessary for both above-grade and below-grade spaces, such as roofs, terraces, and foundation walls. Without proper waterproofing, buildings are susceptible to water infiltration, which can lead to mold, corrosion, and weakening of the foundation over time. Hydrostatic pressure from soil moisture or water pooling around foundations further emphasizes the need for reliable waterproofing solutions.
Polyguard’s waterproof membranes not only protect the structural integrity of buildings they also help maintain a healthy indoor environment by preventing moisture from seeping into the walls and floors. The wide range of applications for these membranes includes foundation walls, roofs, basements, and balconies.
Before starting the installation process, it’s important to gather all the necessary tools and materials to ensure a smooth application.
Tools and Materials You’ll Need
Before starting any waterproof membrane installation, make sure that you have the right tools and materials on hand. Here’s what you’ll need:
- Utility knife
- Rollers
- Primer (specific to the membrane product)
- Heat gun or adhesive for application
- Polyguard Home Stretch™ Detail Tape and Blue Barrier 2200 for additional sealing.
- Protective gloves and eye gear
Once all tools and materials are prepared, the next step is to begin the waterproofing process by addressing the foundation, which serves as the critical base for long-term protection.
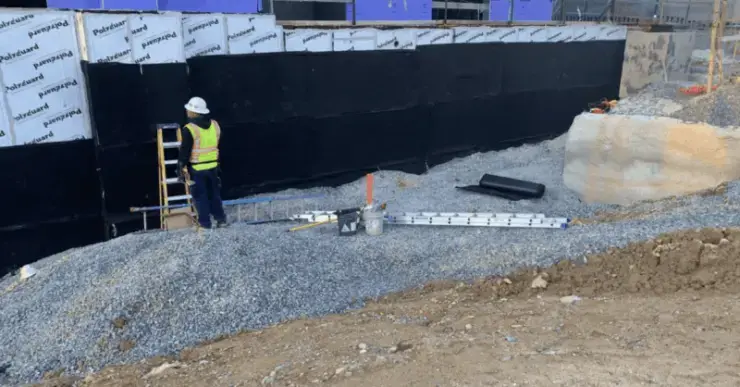
Foundation Waterproofing Membrane Installation
Proper waterproofing begins with the foundation. To prevent moisture from damaging foundation walls, follow these steps for membrane installation:
Step-by-Step Process
1. Prepare the Surface
Clean the foundation wall thoroughly to remove any dirt, debris, or loose materials. Use a non-shrink grout to patch any cracks or holes in the concrete. Any irregularities in the wall should be smoothed out before proceeding.
2. Prime the Surface
Apply a primer specifically designed for use with the waterproofing membrane, such as Polyguard 650 WB, and make sure that the surface is fully cured and dry before membrane application. This water-based adhesive enhances adhesion and prepares the surface for waterproofing.
3. Managing Hydrostatic Pressure in Foundation Walls
In areas with high groundwater levels, hydrostatic pressure can exert significant force against foundation walls, and lead to water infiltration through cracks or porous concrete. This pressure intensifies during heavy rainfall or snowmelt, which makes it critical to choose a waterproofing system that can handle these conditions. Here’s how to address it:
- For sites below the water table, a two-ply membrane system is recommended for extra protection against water ingress.
- For foundations above the water table, a single-ply membrane system may suffice, but ensure proper drainage systems are in place to prevent water buildup.
- Always ensure that the membrane is properly sealed at all edges to maximize its effectiveness in keeping water out.
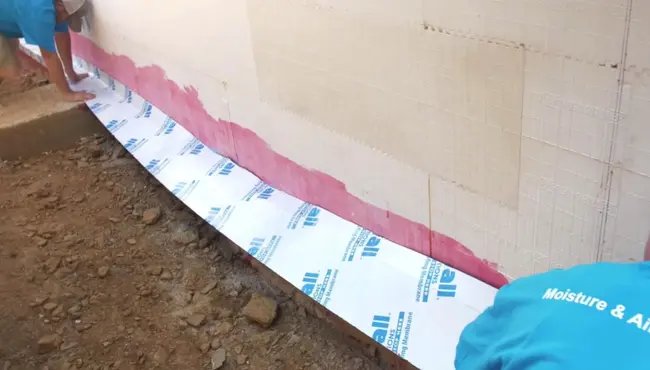
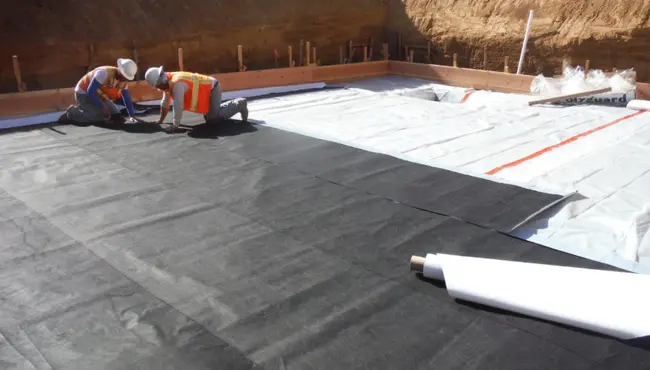
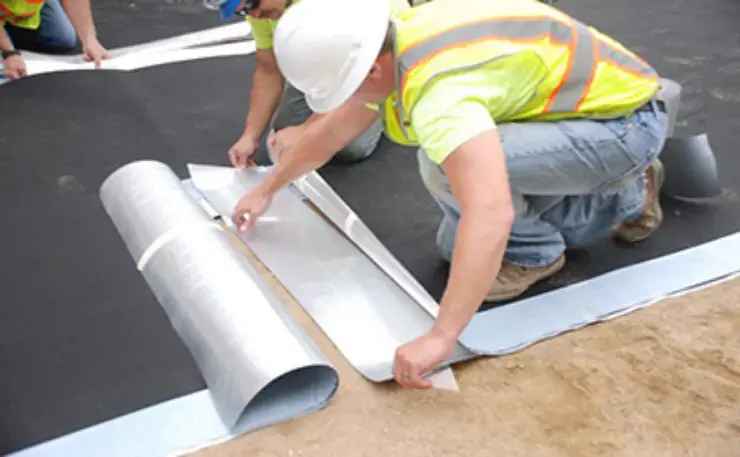
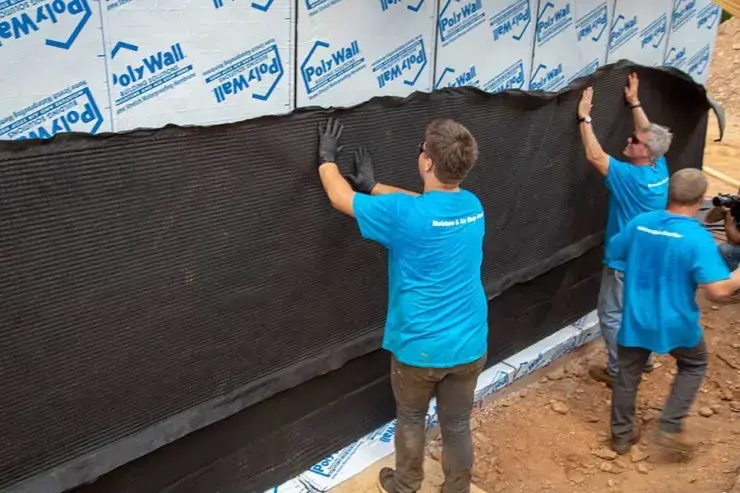
4. Apply the Waterproof Membrane
Unroll the membrane from the bottom of the foundation wall, making sure to overlap the edges by at least 6 inches for optimal sealing. Use a roller to press the membrane down firmly, to ensure a tight bond. For particularly wet sites, extend the membrane further onto adjacent walls.
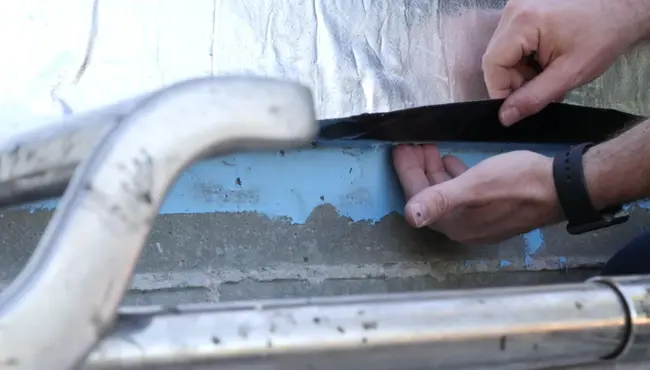
5. Seal the Edges and Corners
Use Polyguard Home Stretch™ Detail Tape to seal edges, corners, and any penetrations through the membrane, such as around window wells or pipes.
6. Install Proper Drainage Systems
Installing drainage systems such as a French drain or perimeter drain at the base of the foundation ensures that water is diverted away from the walls, to reduce the risk of hydrostatic pressure causing water infiltration. For additional protection, consider installing a sump pump system to remove excess water from around the foundation. This is especially critical during heavy rainfall or in cases where the soil around the foundation does not drain well.
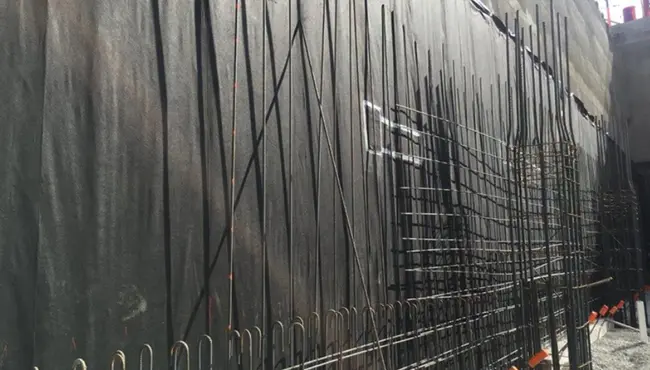
7. Backfill Carefully
Once the membrane is fully applied, cover it with a protective drainage board or insulation panel to prevent puncturing during backfill. Backfill the area around the foundation in layers to avoid shifting or damage.
With the foundation protected, it's time to apply waterproofing solutions to the basement, to address both interior and exterior needs for comprehensive moisture defense.
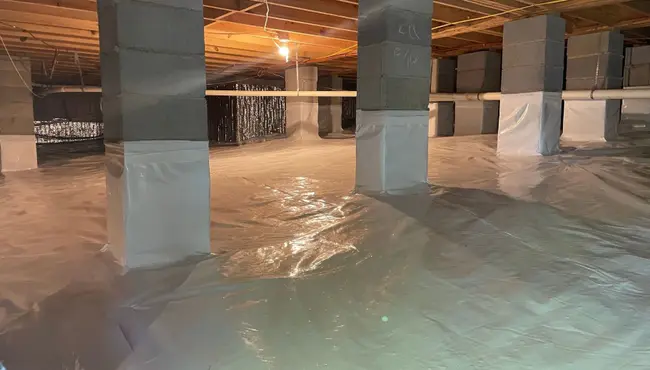
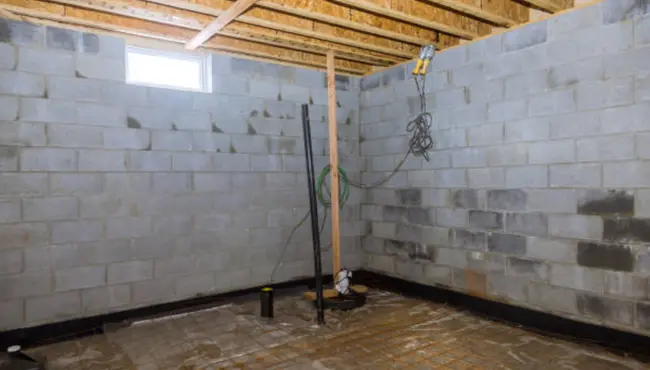
Basement Waterproofing Membrane Installation
In basements, waterproofing is equally important to prevent mold growth and structural weakening due to moisture. Basement waterproofing is often applied to both interior and exterior surfaces depending on accessibility and the degree of water infiltration.
Exterior Installation
For exterior basement waterproofing, the process closely mirrors that of foundation wall installations. Begin by excavating the area around the basement walls, and make sure that you have full access to the surface. Follow the same cleaning, priming, and membrane application steps used for foundation walls.
- Apply the membrane to all walls that are in contact with soil.
- Use a drainage mat for additional moisture management.
Interior Installation
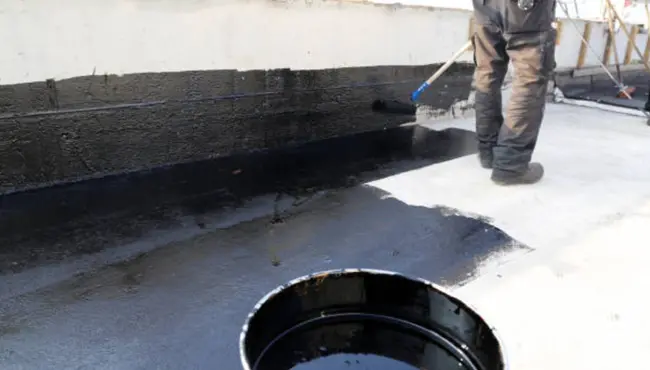
If access to the exterior is limited, interior waterproofing is an alternative. Use liquid-applied membranes like Polyguard’s Blue Barrier 2200 for a seamless, protective layer. Seal cracks with Blue Barrier Gap Filler 2200 before applying the membrane, which helps ensure that water does not seep through any weaknesses in the concrete.
Other Interior Waterproofing Options
When exterior excavation is not feasible, interior waterproofing can provide an effective alternative for managing moisture. One commonly used technique is applying vapor barriers, which help control moisture migration through basement walls. Vapor barriers are particularly useful in areas with high indoor humidity or when groundwater poses a risk to interior spaces. These barriers prevent water vapor from condensing on walls, to reduce the likelihood of mold growth and structural damage.
For cracks in the walls or floor, epoxy injections or polyurethane sealants can be used to create a watertight seal. These materials are injected under pressure to fill and seal cracks, and provide a durable solution that prevents water from entering through weaknesses in the concrete. Combined with proper dehumidification and drainage systems, these methods ensure a comprehensive approach to interior waterproofing to keep basements dry and safe.
With the basement waterproofed, attention now turns to the roof, where effective waterproofing is just as important to prevent moisture infiltration from above.
Roof Waterproofing Membrane Installation
Waterproofing a roof requires special attention due to constant exposure to the elements. Polyguard’s roof membranes are designed to withstand UV rays, temperature fluctuations, and foot traffic. Here’s how to install a waterproof membrane on a roof:
Step-by-Step Process
1. Prepare the Roof Surface
Clear the roof of any dirt or debris. Inspect for and repair any existing cracks or holes using a quality patching cement.
2. Roll Out the Membrane
Starting at the bottom edge of the roof, unroll the membrane upwards. Overlap the seams by 3-6 inches to prevent leaks. Use adhesive or fasteners to secure the membrane at key points, particularly around vents, chimneys, and roof edges.
3. Seal the Details
Apply Polyguard’s Detail Tape around penetrations and edges to ensure a watertight seal.
4. Inspect and Press Down
Use a roller to press the membrane down firmly in order to eliminate any air pockets or wrinkles. Once installed, the membrane will provide long-term protection against moisture and the elements.
After addressing the key areas of waterproofing, it's important to consider common installation mistakes and how to adapt techniques based on climate conditions for optimal results.
Avoiding Common Installation Mistakes and Adapting to Climate Conditions

Proper installation of waterproofing membranes can be challenging, especially in varying climate conditions. Certain common mistakes can compromise the effectiveness of the system, and lead to costly repairs down the line. Here are some best practices and tips for avoiding installation errors in different environments:
Common Installation Mistakes to Avoid
Inadequate Surface Preparation
One of the most frequent errors is applying a waterproof membrane to a dirty or uneven surface. Dust, debris, and moisture can interfere with the membrane’s adhesion and reduce its effectiveness. Always ensure that the foundation is clean, dry, and smooth before beginning installation.
Improper Overlapping
Failing to overlap the membrane sufficiently is another common mistake. Overlaps should be at least 6 inches to ensure a watertight seal. Gaps in the membrane or insufficient overlaps can allow moisture to penetrate the foundation.
Incorrect Use of Adhesives or Primers
Using the wrong type of adhesive or failing to apply primer when required can lead to bond failures. Polyguard’s membranes, like the Home Stretch™ Membrane, require specific primers for optimal adhesion.
Best Practices for Specific Climates
Cold Weather Installation
In colder climates, the membrane’s ability to bond can be reduced if the surface temperature is too low. For these conditions, choose membranes like Polyguard’s Home Stretch™ Membrane, which can be installed in temperatures as low as 25°F. Ensure the surface is free from frost, as it can interfere with adhesion.
Wet or Humid Conditions
In wet climates, ensuring the foundation surface is dry before applying the membrane is critical. Moisture trapped under the membrane can cause blistering or delamination. Use a heat gun or wait for drier conditions if necessary to ensure a dry surface.
High Temperature Installations
When installed in hot climates, membranes can become overly flexible or tacky. To avoid this, install during cooler parts of the day, such as early morning or late afternoon, and ensure that the membrane is applied quickly to avoid overstretching.
Recognizing when waterproofing is necessary is key to preventing major damage and costly repairs. Homeowners and contractors should watch for specific signs that indicate moisture problems.
Signs That Indicate the Need for Waterproofing
Early detection of moisture-related issues can save homeowners and contractors from expensive repairs down the line. Here are common signs that waterproofing may be necessary:
- Damp or Wet Walls: Moisture buildup in walls is a tell-tale sign of water infiltration.
- Mold Growth: Visible mold, especially in basements or crawl spaces, indicates the presence of excessive moisture.
- Cracks in Foundation or Walls: Cracks allow water to seep into structures, which can lead to further damage.
To ensure the waterproofing system remains effective over time, regular maintenance is essential to protect your investment and avoid future issues.
Maintaining Your Waterproofing System for Longevity
To ensure the effectiveness of your waterproofing system, regular maintenance is key. Inspections should be scheduled to check for any signs of wear or damage to waterproof membranes, especially at seams, corners, and edges where leaks are more likely to develop. Regularly inspect sump pumps and drainage systems to make sure they are functioning correctly, as these are crucial for managing excess water around the foundation.
In addition, clearing gutters and downspouts ensures that rainwater is properly diverted away from the foundation. Even high-performance membranes like Polyguard require periodic checks to confirm they are in good condition and still provide full protection against water infiltration. By addressing minor issues early, you can prevent costly repairs and extend the life of your waterproofing system.
Ensure Long-Term Protection with Polyguard
When it comes to safeguarding your structure from moisture, Polyguard waterproofing products provide comprehensive, high-performance solutions. From foundation walls to roofs, Polyguard offers a full range of membranes and accessories designed to prevent water infiltration and the associated risks.
Contact us today for more information!